1.) To setup roaming profiles in Windows 2012 Server, you need to create a shared volume on one of the servers in the Active Directory Domain. If this is already done, skip to step 5.
2.) Create the folder "$Profile" on one of the servers in the domain that is accessible by domain name.
3.) Share the folder.
4.) Give full access to that folder (read/write) to any user who will be needing a roaming profile.
5.) Go into the Sharing tab of the properties of that folder and copy the full path of that folder.
6.) Place that path in the "Profile path" folder in the Profile tab of the user's settings in AD Users and Computers.
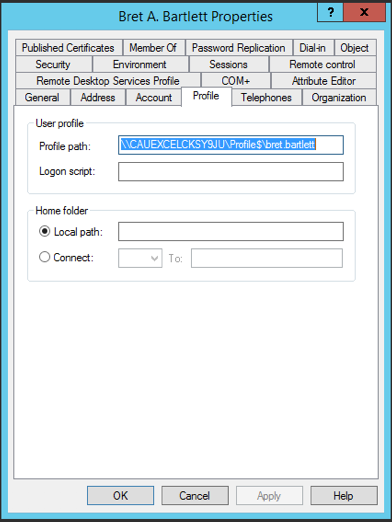
7.) Make sure you then add the user's name following the full path as shown above.
8.) Save the settings and the user will now have a roaming profile when they next log into a Windows computer using their domain user.
0 Comments