This article will guide you through the process of setting up a L2TP VPN connection in Windows 10.
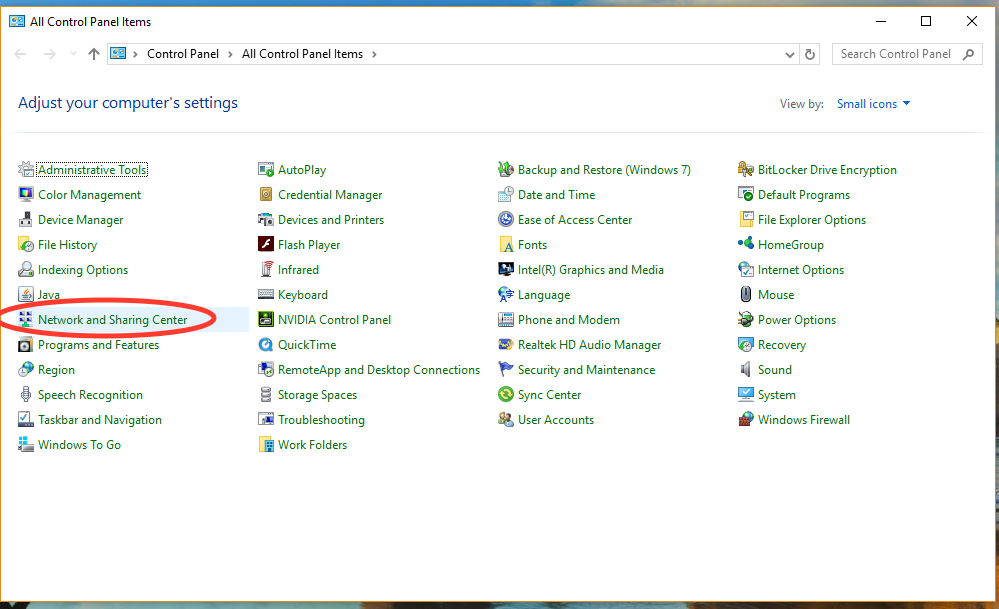
First, right click on the Windows icon in the lower left hand corner of your screen and select Control Panel. Then click on "Network and Sharing Center."
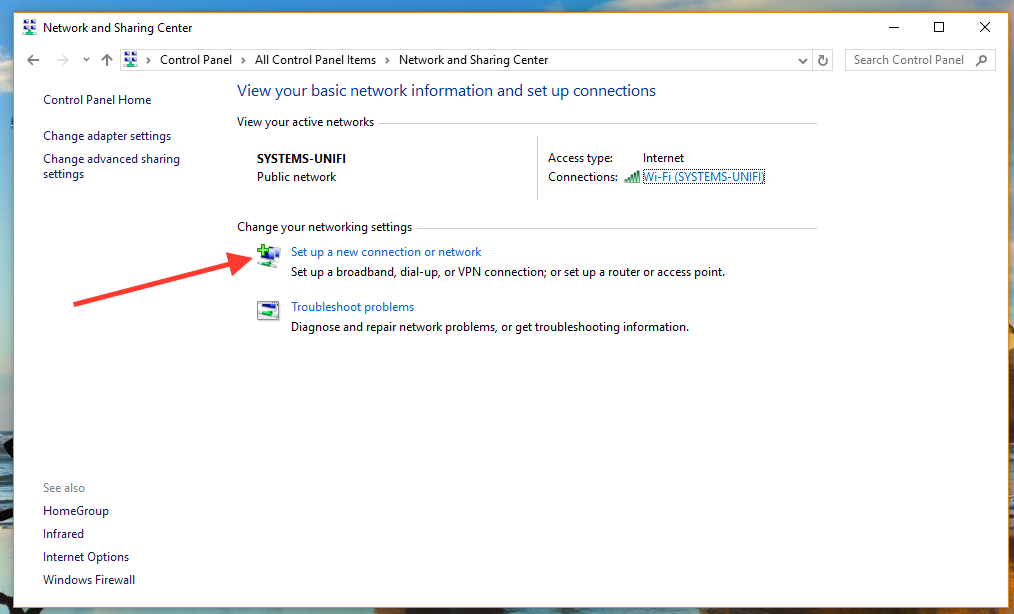
Click on "Set up new connection or network."
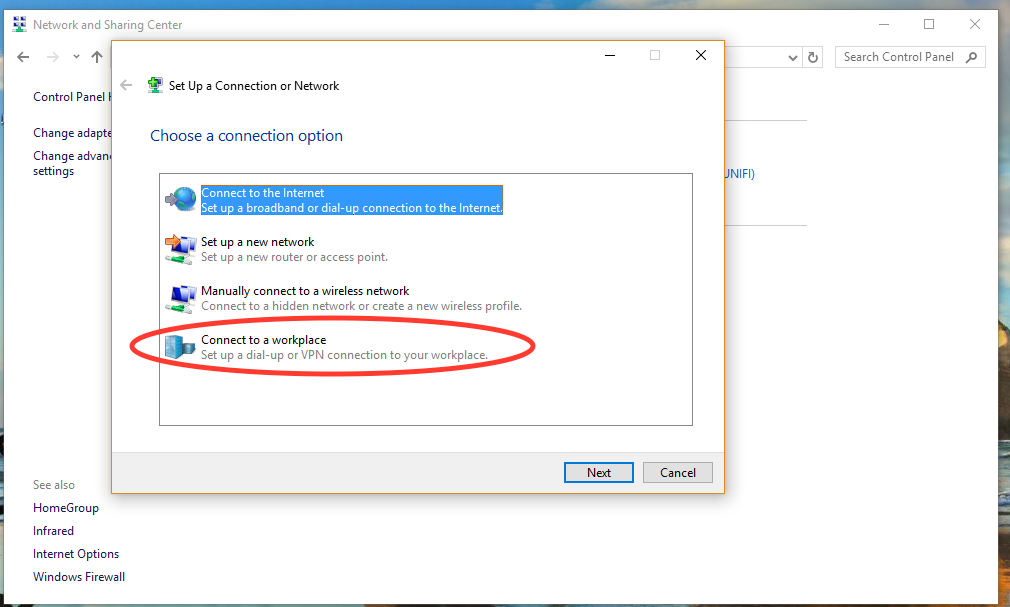
Click "Connect to a workplace."
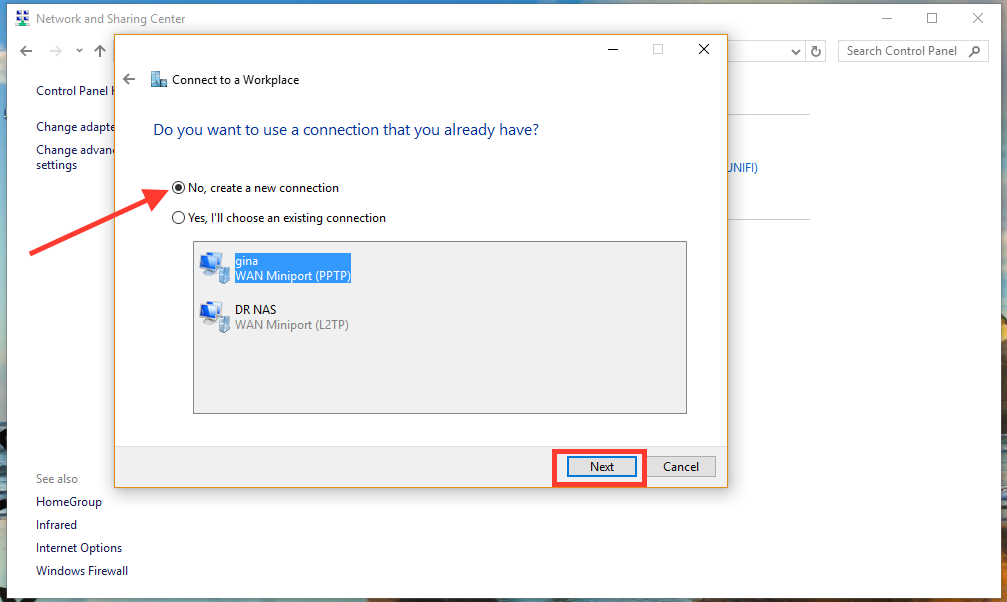
Select "No, create a new connection" and hit next. NOTE: Windows may skip this window if you don't already have other connections. If so, move on to the next step.
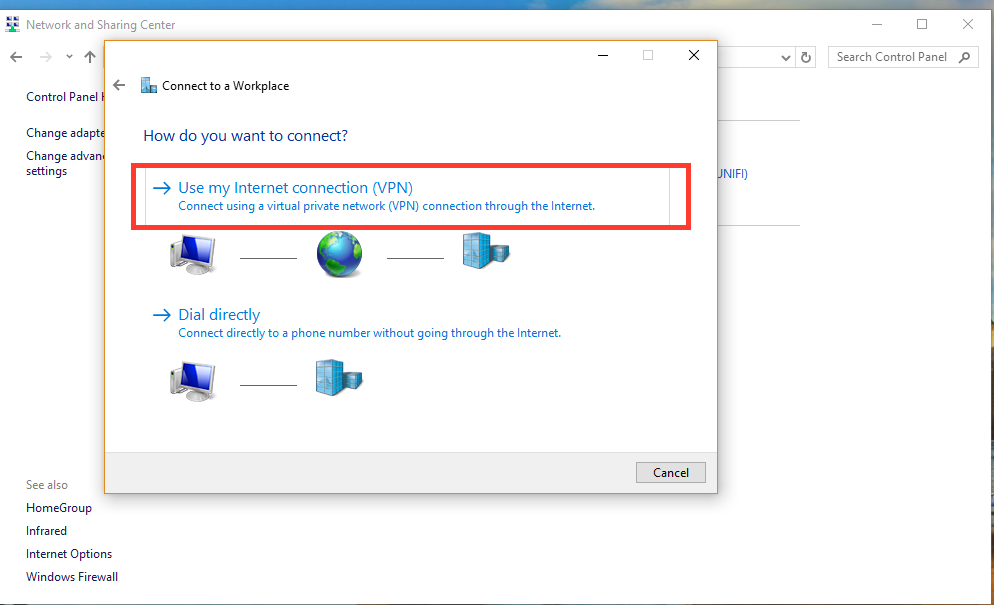
Select "Use my Internet connection (VPN)."
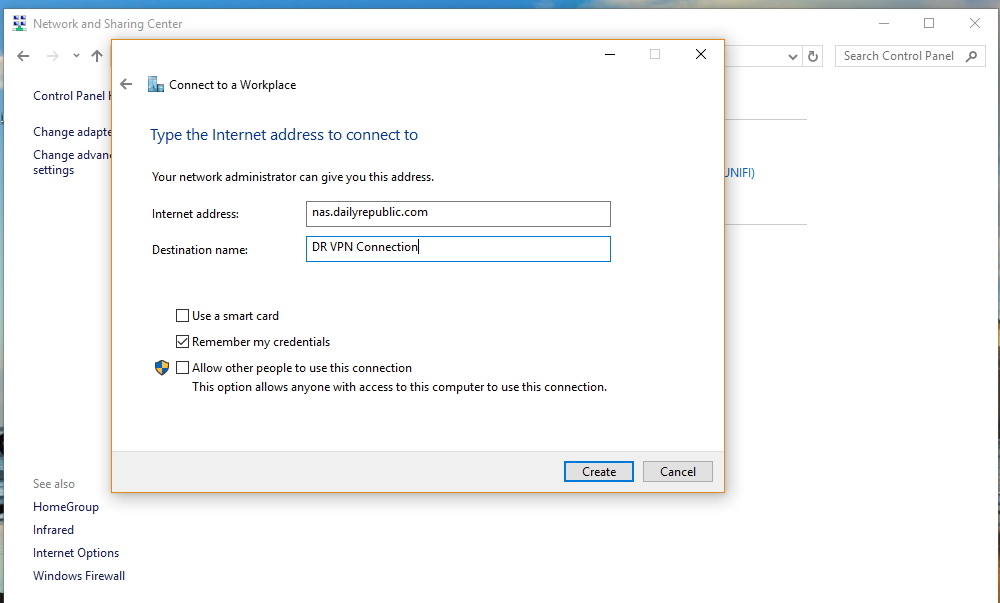
In the "Internet address:" section, type "nas.dailyrepublic.com." Note: This will be "nas.davisenterprise.com" if you are connecting to the Davis Enterprise, or "nas.mtdemocrat.com" if you are connecting to the Mountain Democrat.
Under "Destination name" type a name that you will recognize. This name will allow you to identify the VPN connection from other connections in Windows.
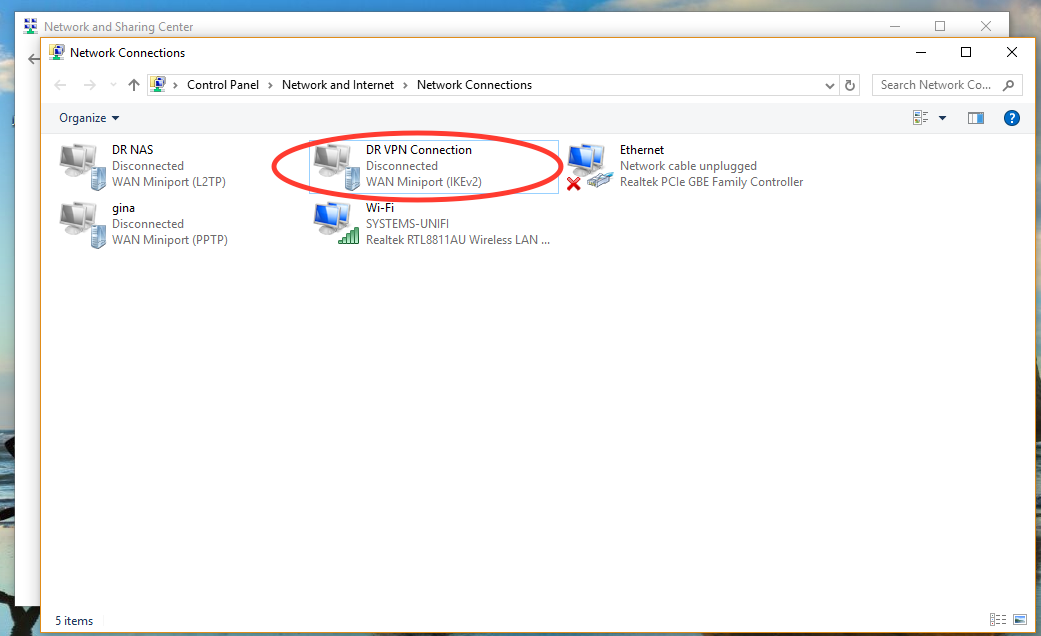
At this point, go back to Control Panel > Network and Internet, and click "Change Adapter Settings" on the left hand side of the window. Then double click on the new connection that you just created. Windows might have already put you back into the "Network and Sharing" window. If so just click "Change Adapter Settings" on the left and double click on the connection you created.

This will open up a settings window like the one shown above, and you want to click on the connection that you created.
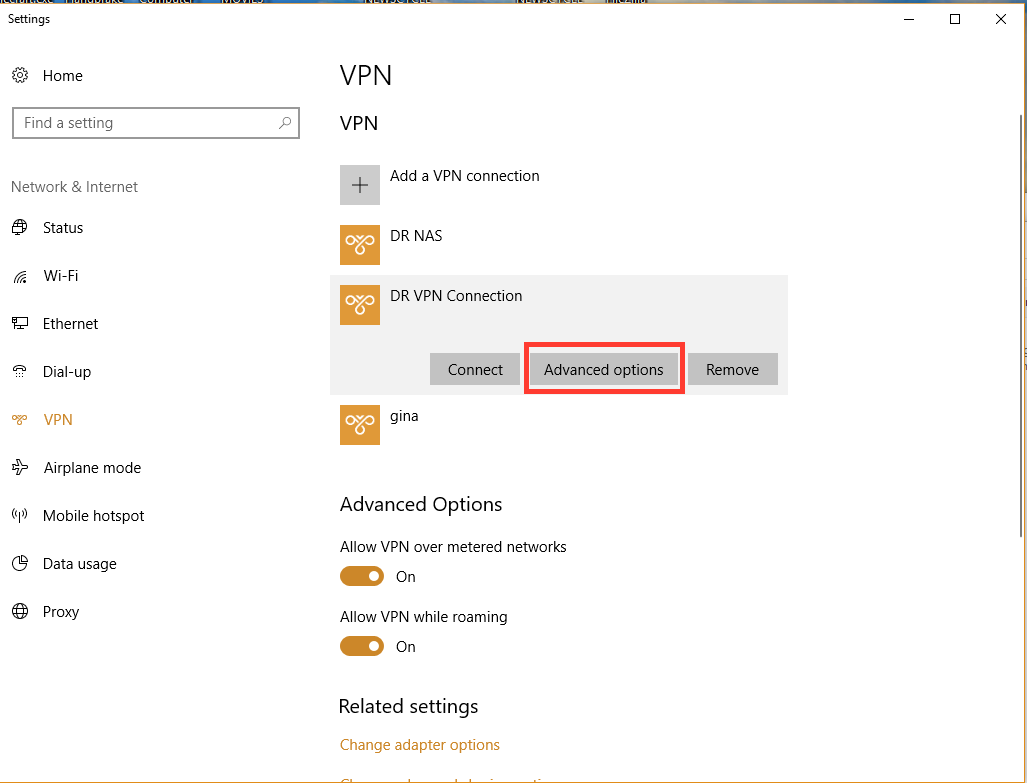
This will open up some additional options and you want to click on the "Advanced options" button.
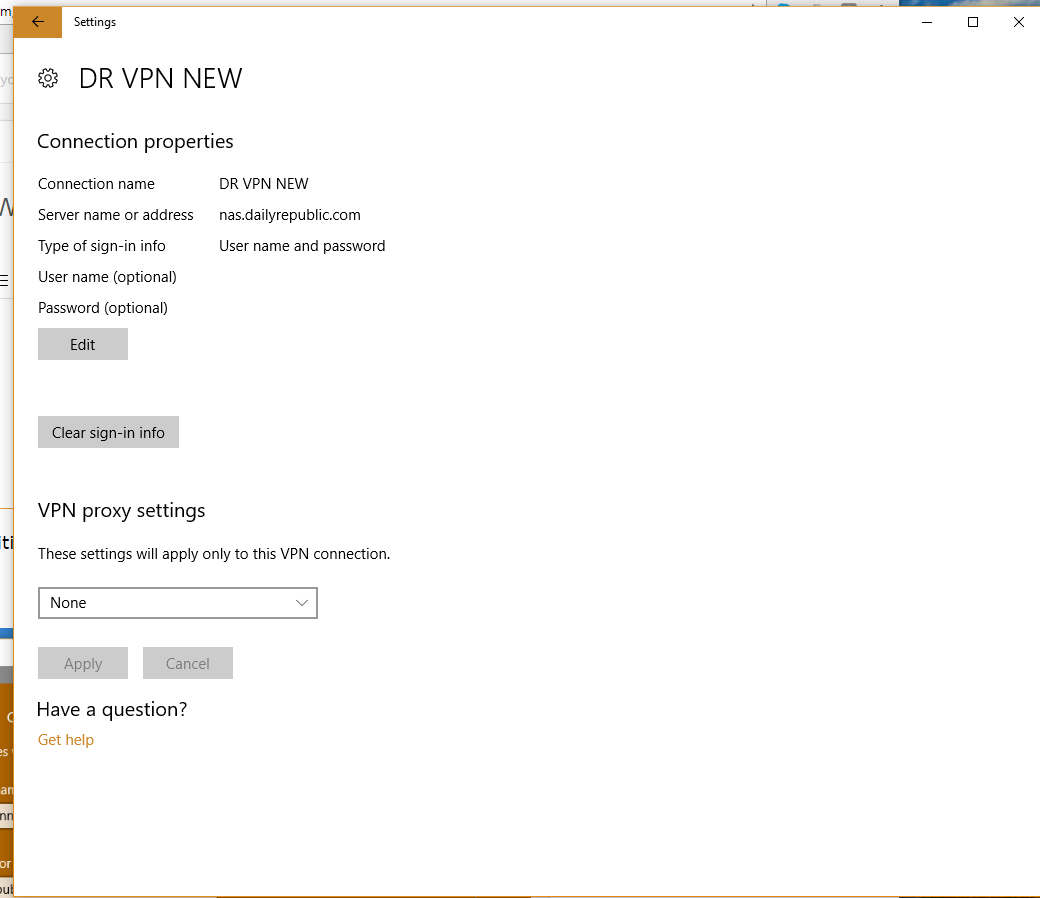
Then, under "Connection Properties" click "Edit."
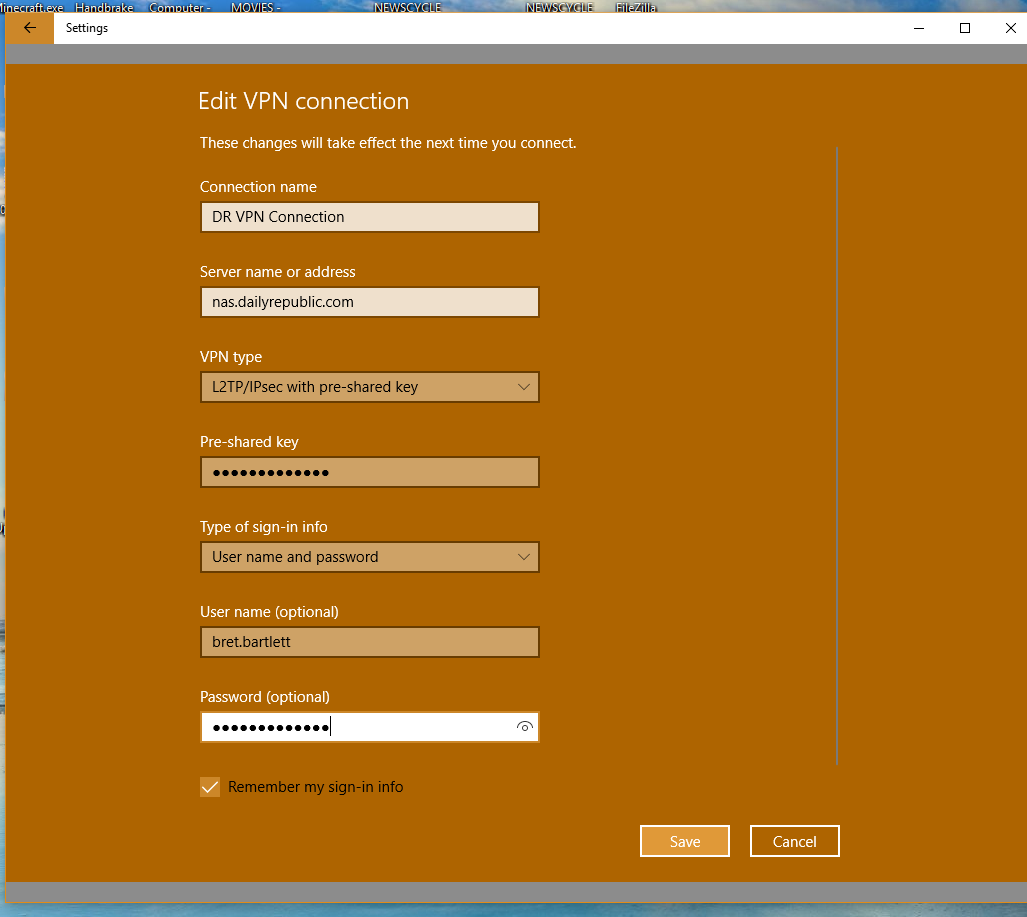
In this window, select "L2TP/IPsec with pre-shared key" under the VPN type pulldown menu.
In the "Pre-shared key" box you want to type 2ndF=Fisk.
In the "Type of sign-in info" pulldown menu, you want to select "User name and password."
Enter your NAS username (firstname.lastname) in the "User name" box.
Enter your NAS password in the "Password" box.
Check the "Remember my sign-in info" box, and click SAVE.
Then click the arrow in the upper left hand side of the window to get back to the VPN Settings window.
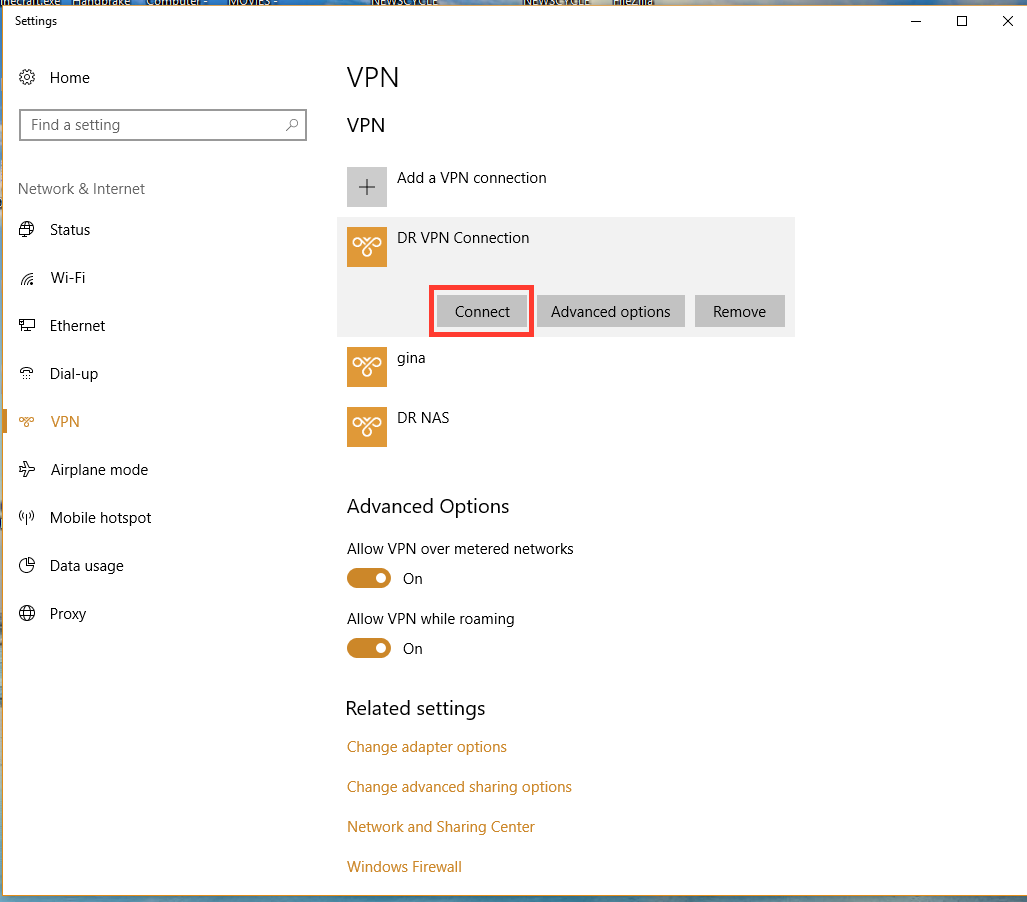
Once you are back at the Settings screen, select your connection again and click "Connect" to test the connection. NOTE: the connection will only work if you are off-site. If you are testing it from a laptop and are already on the local network at the DR, DE or MD, the connection will fail.
****** PLEASE NOTE ******
When connecting to the VPN, you will not be able to access the local server at your local site from the normal address. You must use the VPN address of the NAS server at your site to access it through the VPN. See below for the VPN address of the server at your local site:
Daily Republic: smb://10.9.0.0/DR
Davis Enterprise: smb://10.6.0.0/DE
Mountain Democrat: smb://10.11.0.0/MD
0 Comments