You can (and should likely) process a payment quickly and simply using the Payment Form. You can also create payments from the Stripe Dashboard. Unless you have some reason why you can't or do not want to use a new credit card, you should probably use the Payment Form.
See What Is The Payment Form? for more information about how to find the online payment form and what it is. Follow the steps below to process a new payment.
Payment Form
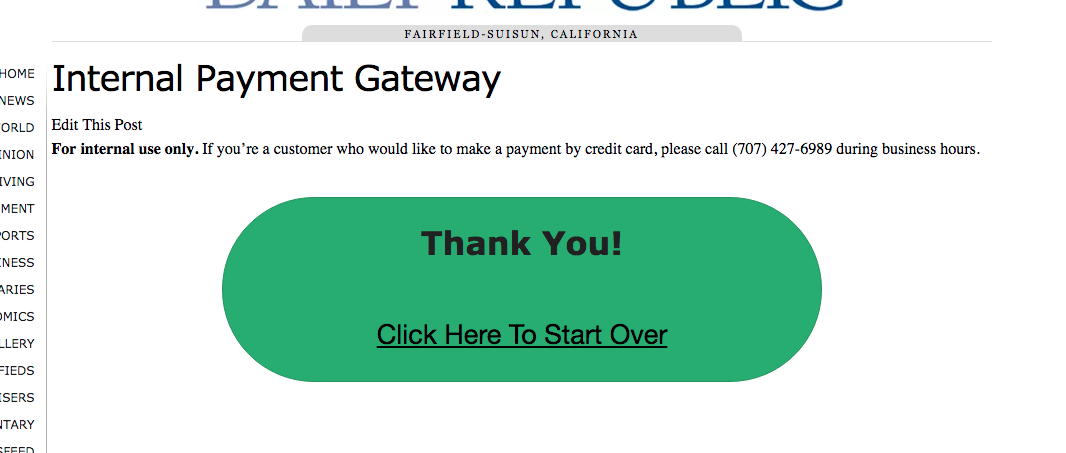
Using the Payment Form is a quick way to process a new payment. To use this form, visit yourpublication.com/pay (e.g. www.dailyrepublic.com/pay)
Step 1: Describe Payment
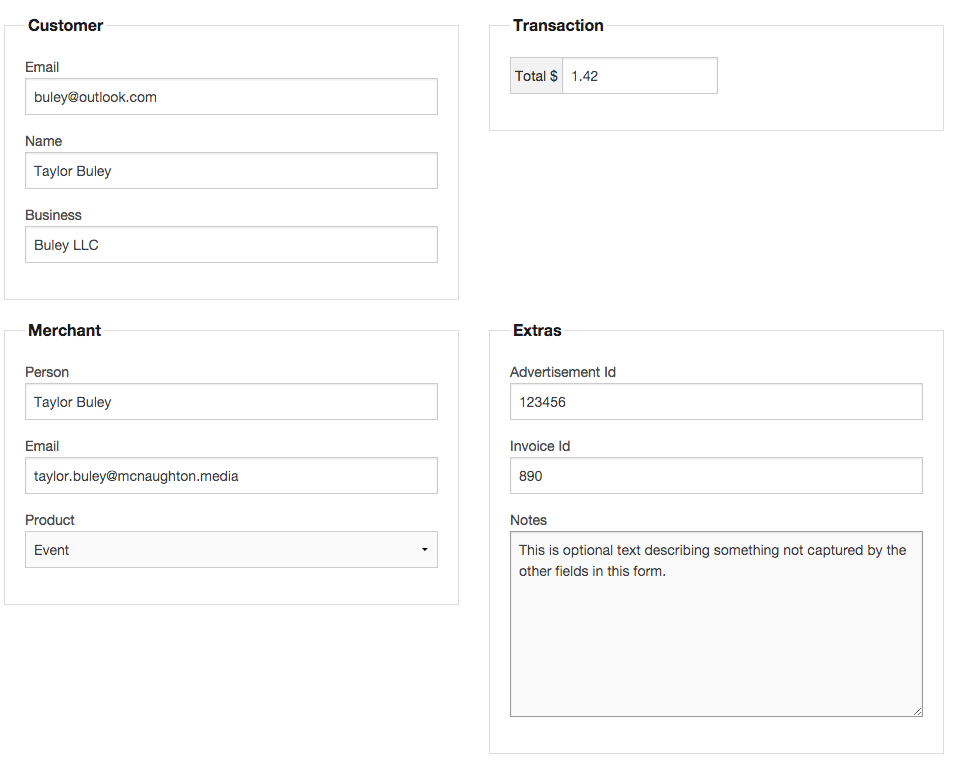
Fill out any applicable fields on the Payment Form. While only step1a) email and step1b) either a person's or business name is required (in order to identify and describe a Customer Record, respectively), using as many fields as applicable makes it easier on the reporting and accounting end of things. See What Is The Payment Form? for more information on these various fields and their uses.
Step 2: Confirm Payment
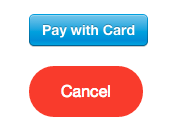
Step 2a) Once everything is ready to go, click the green "Ready" button. The reason this button exists is that we don't actually handle the payment ourselves. With the Ready button what we're doing essentially is sending the transaction to Stripe for further handling.

When you hit this button, you'll get two new options: Cancel means "forget it" and stops the process. Click that red button to cancel out at this point, otherwise Step 2b) Click the blue "Pay with Card" to popup a credit card input prompt.
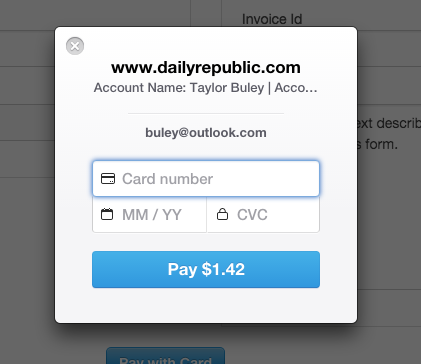
Step 3: Input Card And Process Payment
Step 3a) After clicking "Pay with Card" in step 2b) you'll have an opportunity to input a customer's credit card. We need the CVC in addition to the number and expiration date. The CVC was created to help prevent fraud and our support of this feature is a good security measure. If you mistype something, the field should show a visual indication of what went wrong.
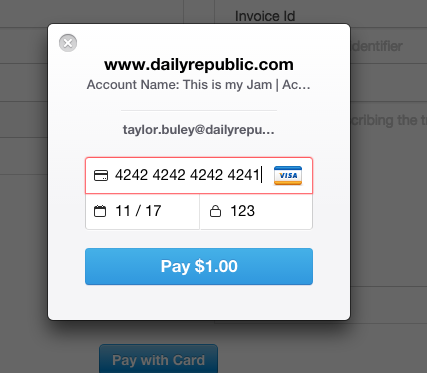
If some credit card information is wrong or invalid you will not be able to proceed with Step 4, clicking the "Pay" button. Below is what an error looks like.
Step 4: Confirm Success
To cancel out at this point, click the little X in the top left corner. Otherwise, click the "Pay" button. It will give a visual indicator of a checkmark if the payment processes successfully and then the form will refresh.

(The image below loops. Wait a few moments if it doesn't look like it's doing anything to watch it reset.)
If you see an error displayed on yourpublication.com/pay after seeing the green checkbox there was an error handing the payment off to Stripe and the transaction probably did not process. Check the Stripe Dashboard to be sure using the steps in How Do I Lookup A Payment? Please also send a copy of the error in text, image or both to help@mcnaughton.media for further investigation.
Stripe Dashboard
There are two ways to create a payment on the Stripe Dashboard. If you don't need a Customer Record, follow the steps below. If you do need a Customer Record, it likely makes more sense to use the Payment Form for the first transaction; otherwise follow the documentation provided in the next paragraph.
You may need to create a new customer record. See How Can I Create A New Customer Record? to do this. To add a card to a record see How Can I Add A New Credit Card To An Existing Customer's Record? and to process a transaction from an existing customer and source see How Do I Process A New Payment Using An Existing Customer Record and Credit Card?.
Step 1: Go To The Payments View On The Stripe Dashboard
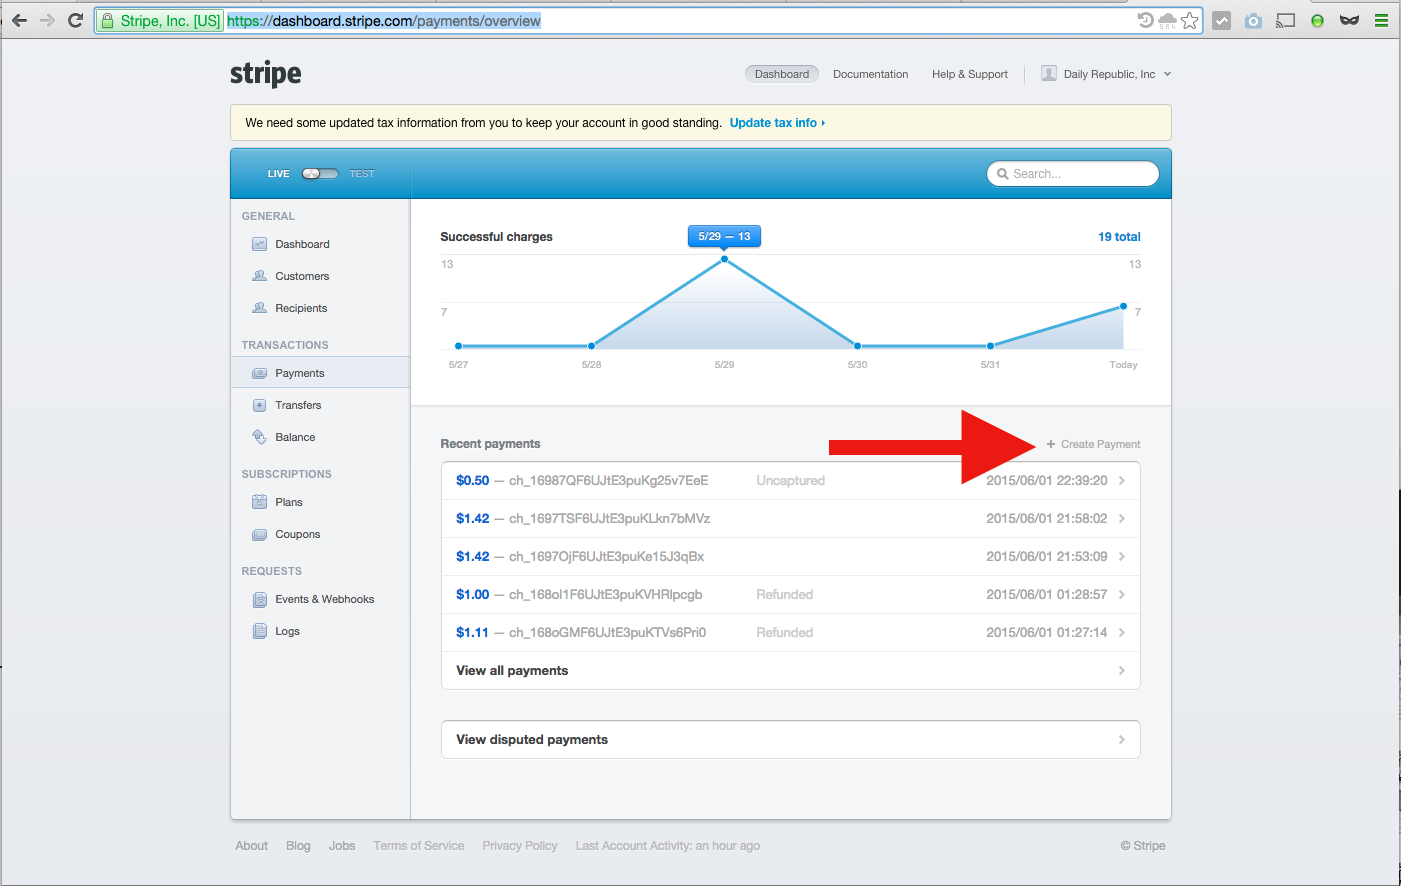
You're creating a new Payment, so Stripe asks you to begin on the Payments view (https://dashboard.stripe.com/payments/overview).
Step 2: Click The "Create Payment" Link
Step 3: Fill Out The "Create a new payment" Form
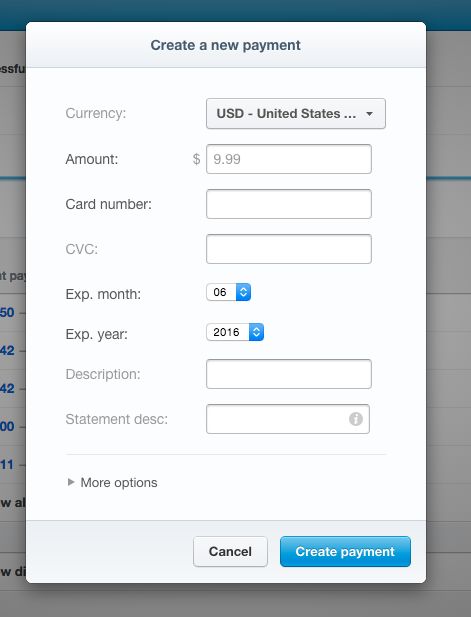
To cancel out on the process, click the "Cancel" button.
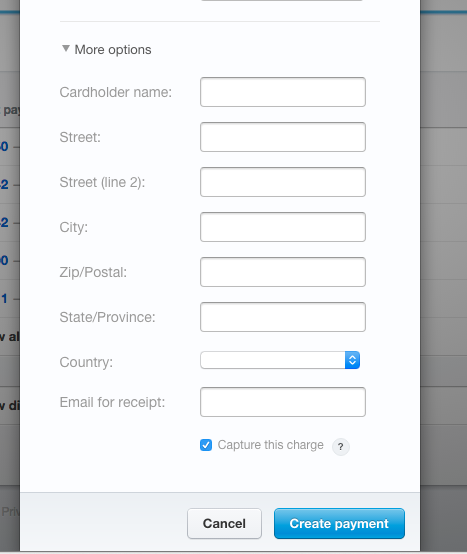
You can manage when the payment is captured in a down down form visible after clicking the "More options" link. That form also contains optional payment address information that will be validated only if provided. It will also allow you to set the email to which the receipt shall be sent.
To authorize a charge but not capture it immediately, uncheck the "Capture this charge" option in the dropdown. The funds are then processed as an "authorization" and we have only 7 days to capture the charge. Follow the steps in How Do I Capture Or Release Authorized Funds? to act on this authorization.
Step 4: Click The Blue "Create payment" Button
0 Comments